Feeds:
Posts
Comments

Posts Tagged ‘renaissance fair’

Recently I made a King’s Landing Handmaiden dress from the ever popular series Game of Thrones. To complete the look, I needed a leather hand-painted belt. This is my step-by step process on how to construct said leather belt. You will need copy paper, a pencil, 3-5oz veg tan leather, leather scissors or a sharp box cutter knife. A leather punch with multiple sizes, a mallet, leather rivets and a leather rivet-setter tool, grommets, a grommet setter, some cord, liquid acrylic paints, and acrylic varnish. Optional leather tooling stamps.

IMG_1127.JPG

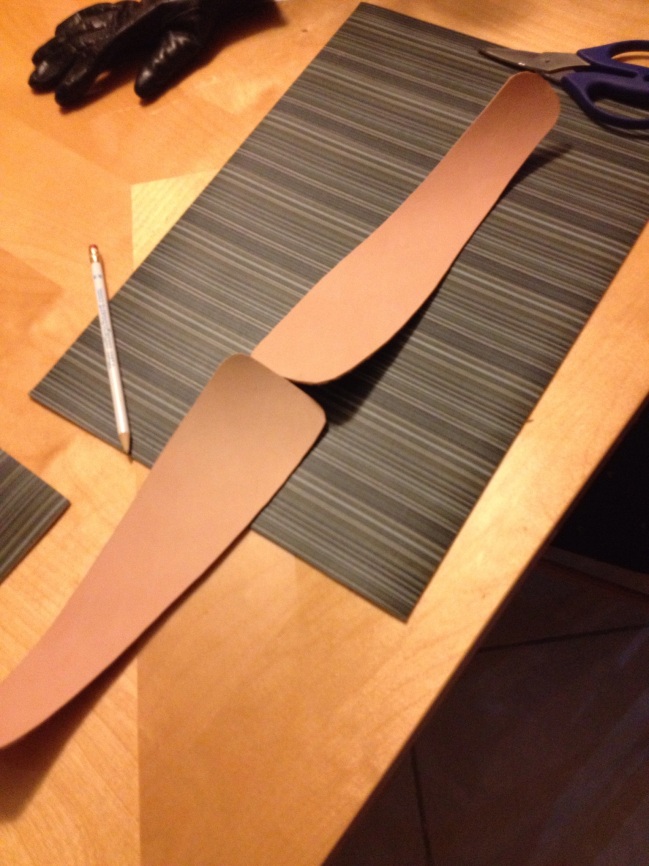
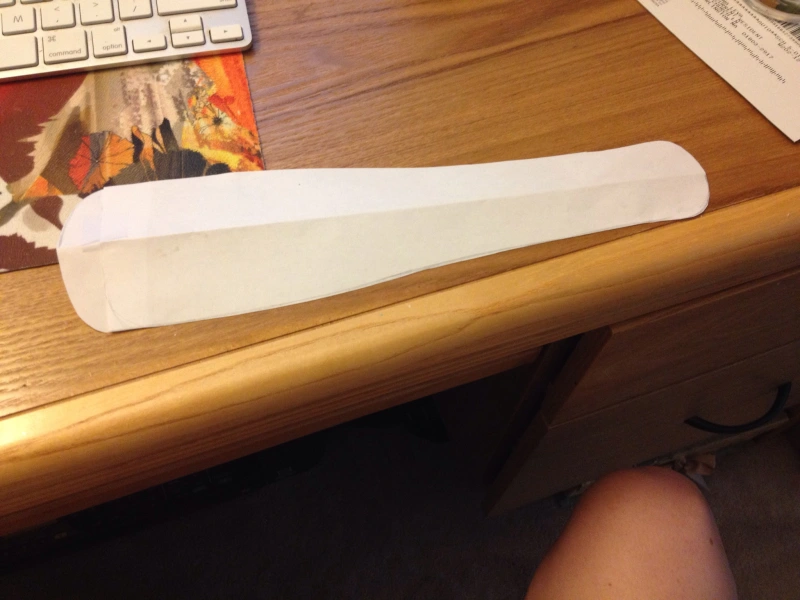
Start by drafting a pattern with a piece of paper. You can customize the size and shape to accommodate your own measurements. This section represents HALF of the belt. One half, on me, was roughly 10 inches long and 3 inches tall. I recommend experimenting and holding it up to your waist to see what looks good on you. If you have a long torso like me, try a tall belt. If you have a short torso, a short belt may look best.

IMG_1128.JPG

Trace the two halves of your belt onto 3-5oz vegetable tanned leather. Cut out using leather scissors or a box-cutter knife. I find that Scissors are way easier to get a clean cut with. You must take extra care with a knife to keep your edges clean.IMG_1129.JPG
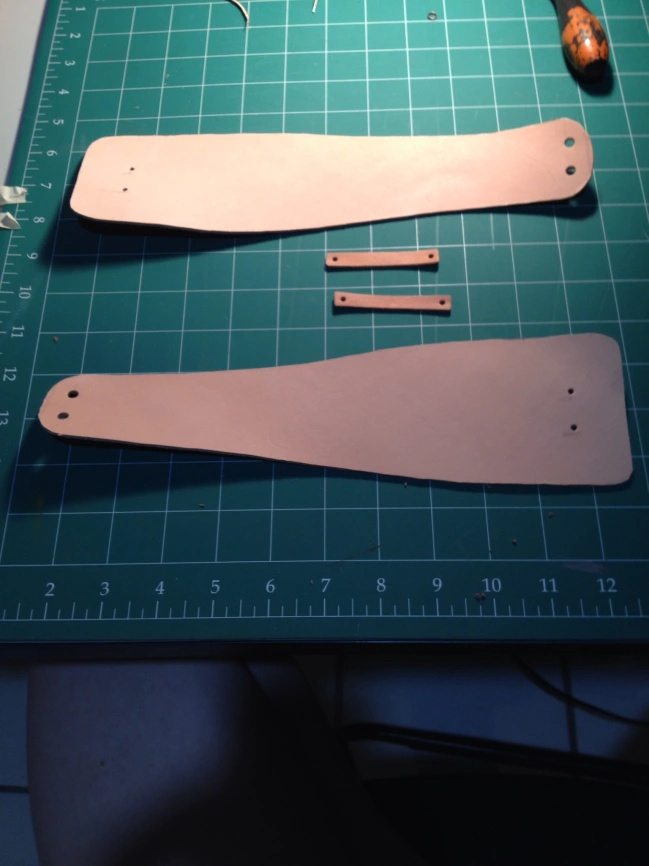
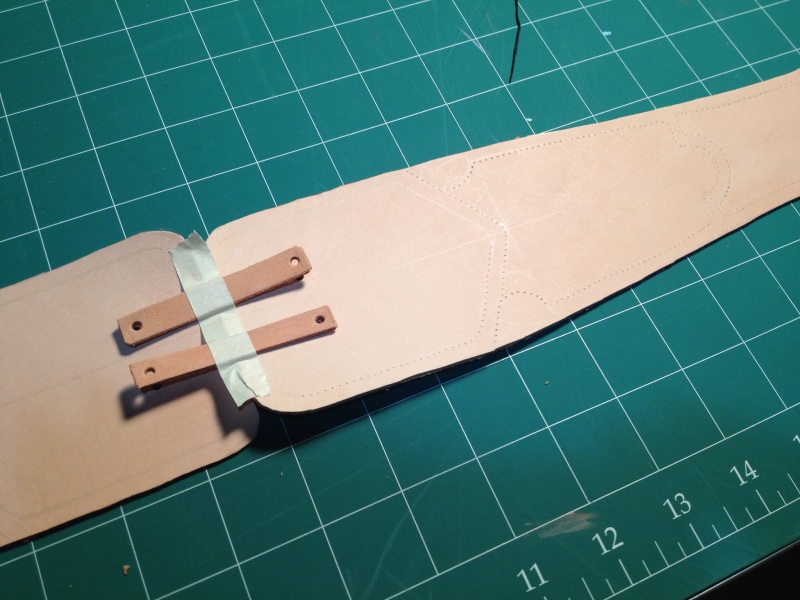
To connect the two halves in the middle, cut some connection pieces for the same leather. I chose to connect the two halves with two thin rectangular strips of leather, but you may choose to use one thicker strip.  Line all the pieces up and mark where to punch holes for your hardware. The smaller holes on the wide side of the belt are for rivets that will join the two halves together. You should punch a hole just big enough to slide a rivet through, and no larger! The larger holes on the thinner end of the belt are for grommets which you will use to lace up the belt when it is complete.

IMG_1130.JPG

At this stage you may add any decorative tooling. I’ve done a simple stippling stitch pattern, which I only loosely followed while painting. It adds an extra level of texture and intrigue to the belt but it is not an essential step.

IMG_1131.JPG

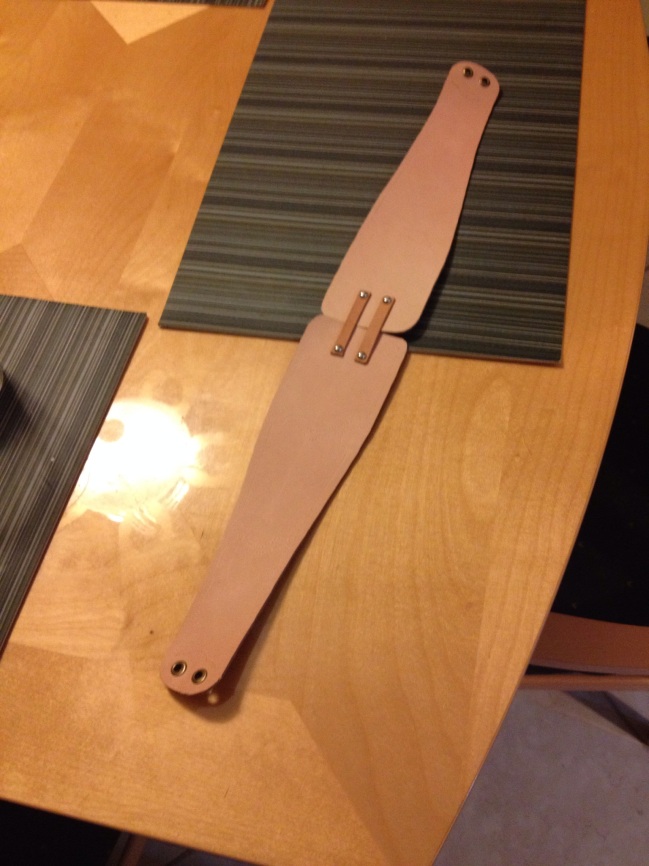
Time for hardware! Rivet the belt together and insert and secure grommets. You will need a rivet setter and a grommet setter. You can’t make it look pretty with make-shift tools.

IMG_1138.JPG

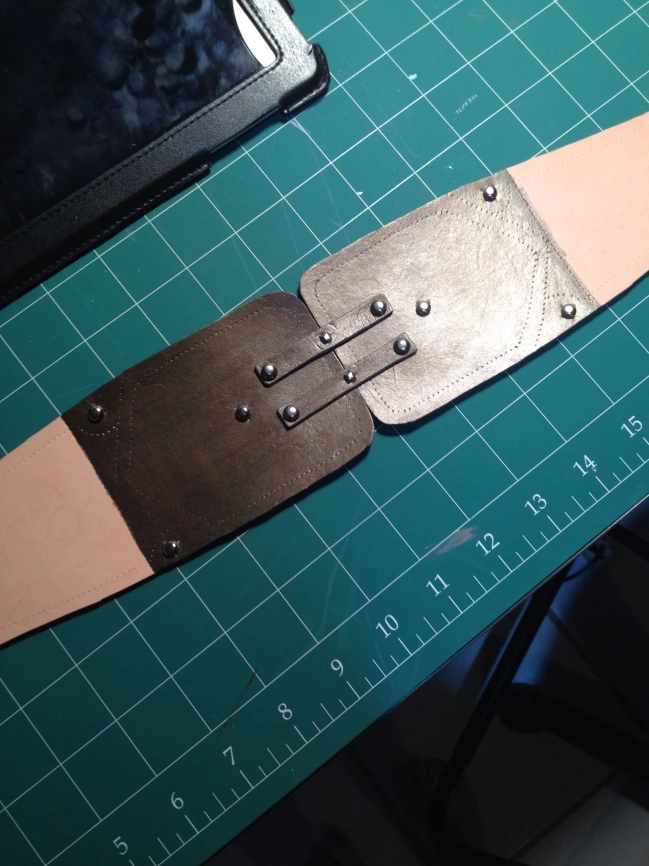
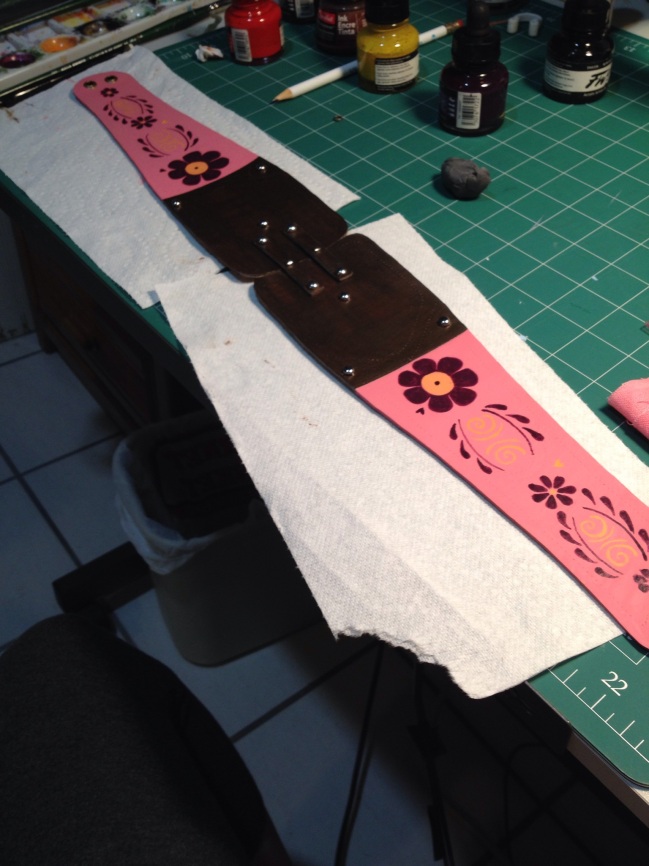
Begin painting and embellishing! I recommend painting before applying any studs or embellishments. I paint my leather with liquid all purpose acrylics, and seal with an acrylic varnish. They come in a range of finishes; I prefer glossy for most projects. The paint that I mixed for the center of the belt had a little shimmer to it, which I think looks nice on a feminine character, but some costumes do not want to look shimmery.

IMG_1187.JPG

Hand-painted details will make your belt really stand-out. Here I did a base coat (or two) of pink over the most of the belt and let it dry completely overnight before painting on the flowers. You can draw lightly over dry acrylics with a pencil to plan out your design. Then paint right over the pencil. When the design is completely dry, use a kneaded eraser to lift up any pencil that is still visible. It should come off pretty easily–don’t scrub too hard. Once all the pencil is gone you can varnish the whole belt.
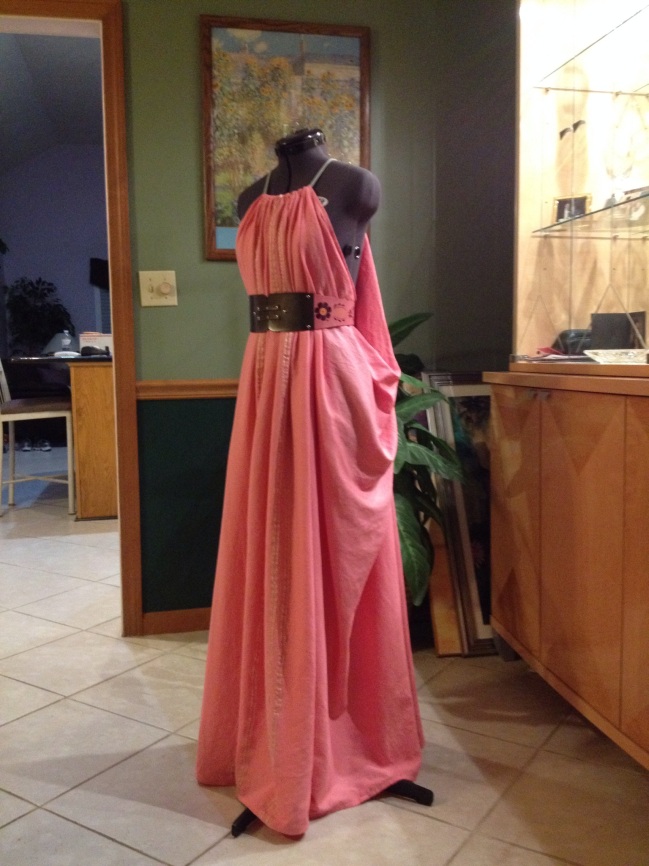
IMG_1189.JPGHere is the belt with the completed handmaiden dress. It really pulls the look together, right?
Read Full Post »

This past weekend I visited King Richard’s Faire in Carver, MA for a day of magic, mischief, comedy, good drink, and fun. Renaissance Fairs are a great way to enjoy the fall season free of modern distractions. The permanent fairgrounds are built right into the forest! There is a tournament field, and two dozen year-round cottages that shops and food vendors rent for the season. This allows the shop-keeps to have a much more elaborate and authentic set-up than other fairs where vendors have to set up and break down every single weekend. The setting is important to the overall experience, and being nestled in the woods is the perfect backdrop for the fantasy affair. The trees provide shade and shelter from undesirable weather, without the claustrophobia of an indoor event. My boyfriend and I were lucky enough to have the perfect weather for our day at the fair: 75 and sunny with a light breeze.

20130910-143534.jpg

Our first stop of the day was the Tournament of Champions, set in a large field and featuring knights on horseback in real armor. We saw jousting, and ring catching and knights stealing beer from the audience. The rest of the day was spent primarily drinking mead and taking in the routines of other performers. Acts included whip tricks, juggling, comedy routines, and a lot of begging for money. It was easy to have a good time as long as you could get past the begging for money, which every performer did…loudly and frequently.

The fair is largely a cash-only event, but to buy food or drink you must first trade in your money for food tickets. Once all my cash had been converted to food, it was a little harder to find small bills in my satchel to tip the performers with.

Though the fair experience is largely defined by the food and entertainment, the other patrons have a significant role in dictating the atmosphere. There were far fewer people than expected in costume. Of course I did see the usual cast members in very elaborate dress, and I could tell that there were a handfull of people who rented their outfits. But I was very surprised at the lack of hand-made, original design costumes. Most people were in street clothes! Where’s the fun in that?

Overall, I have very few complaints that the Faire can control. The food was great, the entertainment was first-rate, and the fairgrounds were as beautiful as ever. I had a wonderful time dressing up and receiving compliments and being called, “My Lady.” But I would have had a more authentic experience if the common folk weren’t all dressed so common. Get creative people! It’s easy, fun, and will make your fair-going all the more special.


Read Full Post »

Renaissance Fair Season is upon us! I love spending a day out in the woods with the  fairies and jesters, celebrating the late summertime magic. The first Fair on my list is King Richard’s in Carver Mass, and to make sure I make the most of my Fair day, I am adding a few new pieces to my costume wardrobe. The most ornate of which is this handy little bag. This small glitzy purse was inspired by the Habib Bags offered by long-time fair vendor “Moresca.” Their work is beautiful, but hardly within budget when I can make some of the pieces, or something similar myself.

20130812-103710.jpg

All of the fabric for this purse, the red tassels, black and gold trim, and the broach were all things that I already owned in my craft bins. The only things I had to buy new were the multi-colored loop trim and the very ornate gold curtain trim with tassels that you see running through the middle. However because I only needed a small cut of each, and could pattern the whole thing myself, this bag cost me under $10 to make! Not counting my time of course. It even has a lining.

20130812-103754.jpg

I also recently made a new belt and mini-bodice which I wore to Connecticon. Made from green brocades and satins, with black and gold trim. Hand beaded and laced with black suede through brass grommets, this matching set is extremely versatile–especially the belt–because it is fully adjustable. I can wear it over leggings or a petticoat and two bustled skirts and it sits just fine.

20130812-103724.jpg

To spice these two pieces up for the fair I added some black and gold chains to the belt and the bodice. I’m banking on warm weather for fair day so that I can wear these chains on an open midriff. I’ll wear a shawl if I have to but the chains do not look as nice over a chemise. Anyone have any other ideas on how to winterize this bodice? I have arm socks or I could always go full cloak, but I don’t really want to cover the whole costume up. Side note–I got these chains on ebay for wicked cheap and they’re REALLY nice. I think they’re aluminum. Very pliable and easy to work with, however they are a nice thick gauge and feel quite strong when tugged on! I’m more concerned about my stitches failing than I am the chains, which is more than I expected for such cheap ebay notions.

20130812-103818.jpg

My favorite method of preparation for the fair involves spending more time outside. This is such a lovely time of year, and feeling a nice breeze on my skin every once and while keeps me motivated. The only other pieces of my costume that I want to update now, is to add a simple black fringe apron to sit under my fancy bag. I think it will frame it nicely and add an even more heavily layered look to my already voluminous skirts.  I’ll be sure to post more pictures when the whole outfit is done!

Don’t forget to subscribe to my main blog for more posts on ALL things arts, crafts, and sewing (not just the cosplay stuff).

Thanks for reading. 🙂

Read Full Post »

Hey Everyone,

Long time no see. I have been busy getting ready for the Holidays, finishing up my holiday open houses, and of course, making some of my first large scale leather armor pieces. My Etsy shop is finally filling up with the sorts of impressive armor I aim to be known for.

All the armor featured in this post is made from 100% natural vegetable tanned cow hide. At 4-5oz this leather is firm and durable yet retains a degree of flexibility to conform to just about any body. I patterned all the designs myself which means you won’t find the same items anywhere else. All pieces were hand painted using a waterproof acrylic ink, and sealed with a waterproof varnish. Now all I have to do is get my hands on some models so I can photograph these on the human body.

I am also looking for suggestions as to what people would like to see used for body straps. At the moment my shoulder armor is the only thing sold in my etsy I that does not included all the necessary straps too wear as is. Everything else comes with all the ties and fasteners needed. Don’t worry, the price of the shoulder armor doesn’t include the cost of straps, and never will. I plan to have folks buy straps separately. But what types of straps are you looking for? Do you want to see belts of military webbing, real leather, fake leather? Options for all three? Poll at the bottom of the post.

Now, some of you may be thinking, “what even are these things?” Well, they are all different types of wearable leather costume armor, made personally by me for the upper body. To find out more specifics about each item, how they were made, how to wear them, and what they are selling for, you should probably click on the pictures! Again, this armor is designed to fit a wide range of people from petite to really really large. However, if you are looking for something made specific to your measurements and with a custom design, you should get in touch with me either through my Etsy, by leaving a comment, or through my website. Thanks for reading!

Read Full Post »