Feeds:
Posts
Comments

Archive for August, 2011

To go with my steam-punk attire I have made a sci-fi bolero and another skirt. The bolero matches the ball gown skirt that I already made, but you’ll have to wait to see them paired together until september!

I actually started this skirt months ago when I made my bustle because I loved the fabric. However at the time, I couldn’t decide what to do with the skirt to make it interesting. I didn’t have enough fabric to make a full-length skirt, and a knee-length circle skirt seems a little plain for a costume. I’m striving for extravagance, here. So I decided to tack the skirt up on itself to create some bustling in the front. A little short by itself, but I think it will go great with the right pair of bloomers, or used as an overskirt. to embellish something longer. I know I’ll use it for something!

I tend not to iron things before I photograph them, I know. It is just so painful to iron something only to store it in my closet for a month or two before wearing it out.

As I said before, the bolero is the same material as the full length skirt I recently put together. It’s a heavy suiting cotton which takes on different colors in different lights; sometimes it’s green, sometimes grey, green, or brown. I didn’t have a pattern for a bolero, so I had to wing it. I did print out a free pattern from butterick.com, but quickly realized why it was free–thankfully before cutting. The free pattern was just totally wrong, especially the arm holes, and would not have been wearable. Recognizing this pattern flaw right away prevented me from waisting any valuable fabric. Yay! But now I had no pattern.

I ended up starting with a pattern for a bodice, and did some major modifications. I raised the neckline, thickened the shoulders, cropped it, rounded the bottom, etc. The pleating is totally my own, no help from any sort of pattern there. The “sleeves” if you can call them that, are actually from a pattern for a cap sleeve but are supposed to be half that size. Instead of folding them in half, I just lined them and used the large version. It is a very dramatic shape, but I was going for a sci fi look after all. Plus if I’m going to wear a skirt that’s three times my size, I’ve got to balance things out up top. now I’ve got to come up with a shirt that will go well with this bolero. Sleeves or no? Leave me comments!

Read Full Post »

Here you are, everyone. A free Kimono pattern. Use it as is to make doll’s clothing, or blow it WAY up to fit a real human. Kimonos are very simple garments, and so it isn’t difficult to make them fit all sorts of shapes and sizes. Lengthen or shorten the body or sleeves to achieve your desired look. Keep in mind that Kimonos require a lot of fabric!

Click on the image to view larger

Read Full Post »

Remember that skirt I posted in this post? Well I told you I had added channels inside the seams to put draw-strings through so that I could bustle and change the skirt to fit the occasion, and now, I have pictures to share!

Here is that very same skirt with the drawstrings tied up. I bought some extra long shoe laces off of ebay, and strung them through the channels. When the drawstrings are untied, the skirt hangs at its full length, but when you pull the drawstring, the skirt gathers around it to form this stunning bustle.

Here is a close up,

And from the other side. The skirt can’t be made super short, but it the drawstring can pull it up to about my knees, if I wanted.

Yup, I’m very happy with how it turned out.

Read Full Post »

Here is a free pattern for the mini garrison hat that I recently posted. The pattern isn’t for a miniature hat, but you can scale it to be whatever size you want. click here to view the PDF –> garrisoncap

See more of the garrison hat that I made by viewing this post. 


Read Full Post »

Many people are afraid to wash their synthetic cosplay wigs because they are afraid that they will ruin them. You may look at a wet wig and freak out, thinking it is ruined forever. But please, calm down: wet wigs always look like a disaster. There’s nothing to worry about! Washing a wig is actually quite simple.

It is important to wash wigs between styling to get all of the hairspray and styling product out before you start your next styling. Leaving hairspray in a wig for long periods of time can also cause little white flecks to appear in the wig as the hairspray deteriorates. This can cause your wig to loose quality as well, and become coarse or lose it’s shine. That’s why, if you are not going to be wearing your wig for a long time, it’s a good idea to wash it before you store it. But don’t worry, it takes many many month before product will start to deteriorate high-quality wigs. I have yet to lose a wig to styling products being left in too long. Most wigs can be revived anyway with a good comb and conditioning.

Anyway, to wash your wig, first clean your sink, and rinse the sink to get all the cleaning products off. Then fill your sink with room-temperature water. You don’t want to use hot water because you don’t want to make the fibers pliable, just clean them. So room temperature, to slightly warm should do it. Use a cap full or about a quarter size squeeze of gentle shampoo. Baby shampoo is ideal, but anything that says “gentle” on the bottle should work, just don’t use too much. You can also buy special wig shampoos on the internet. I have not found need of them.

Swish around the water with your hand to distribute the shampoo. Remove the wig from your wig head and make sure there are no pins, wig caps, or accessories still in it. place the wig in the sink and gentle move it side to side. Do not swirl, scrunch, or knead the wig. Wig fibers become very weak when wet, so you need to slosh the wig back and forth in the water gently. Let the wig sit for only five minutes to let the shampoo do its job. Then, lift the wig out of the sink carefully. Drain the sink, refill the sink with room temperature water, and put a cap full of conditioner in the water and slosh it around. There are wig conditioners available online, but I find that my own conditioner for real hair is fine.

The conditioner may clump up in the water. With you wig off to the side, break up any clumps of conditioner before putting your wig in the water. This can be a challenge, but you don’t want any little conditioner clumps getting stuck in your wig because they’re not that easy to wash out. You want to break up and dissolve the conditioner.

Once you have minimized conditioner lumps, gently place the wig back in the sink and once again slosh it side to side gently. Let sit for five minutes. Now, once again, remove the wig from the sink and place it off to the side. Drain and refill the sink, but this time, don’t put any product in the water. Place the wig in the sink and slosh it from side to side gently for about five minutes to get all the conditioner out. If there are any clumps stuck in it, carefully remove them while the wig is submerged in water.

Once you think you’ve got all the conditioner out, remove your wig from the sink, and stretch it over a wig head to dry. You’ll need lots of pins to hold it in place because the water-weight will make it very heavy. Your wig head will probably fall over if not secured. DO NOT BRUSH, COMB, OR REPOSITION THE FIBERS OF YOUR WIG UNTIL IT IS COMPLETELY DRY. Touch it only enough to get it on the wig head. If you sloshed it around gently enough, you should not have trouble accessing the opening for the wig head.

While wet, your wig will look like a terrible mess. But do not fret. As it dries, it will look more like hair again, and less like a slimy, malformed critter. Do not attempt to detangle your wig until it is completely dry. This will take at least 8 hours, and for long wigs, it make take more than 24 hours. Be patient, and don’t wait until the last second to wash out and restyle your wig. You’ll regret it. Your wig may be a little tangled after washing, but with patience you’ll be able to get all the knots out pretty easily. Tangling is just what wigs do, and there isn’t all that much you can do to stop it.

I hope that you found this tutorial helpful and feel better about that sopping fur ball in the sink.

Read Full Post »

To go with the steampunk costume that I am working on, I have made myself a miniature garrison hat.

The hat is made out of a sturdy suiting material, and is lined for a flawless finish.

At its thickest, I had 10 layers of fabric going through the machine at once to achieve the strong brim. Thank goodness for upholstery needles!

The buttons were sewn on by hand. I don’t know where I got such cute buttons, but I have a couple left.  I’ll have to make more matching accessories.

Barely visible in this picture, there is a double-pronged silver hair clip sewn into the back of the hat to keep it firmly attached to my head. Because the hat is miniature, it does not stay on well without the assistance of a hair-clip. But I have no regrets about its size because I think it is adorable.

If you’re interested, you can find more about the leather posture collar featured in these pictures by visiting this post on leather-forming.

Read Full Post »


Here is a free pattern that I drafted myself on how to make a simple bustle pillow, pictured below.

bustle pillow pattern

Click on the link above to view the file. It is a pdf. The pillow i made is 15″ wide and 7″ long at its longest. But you can vary the size for a different look. The ribbon in the pattern is shorter than the ribbon in the picture, but still adequate for tying a bow. You may cut the ribbon any length you desire.

Added under a dress or bustle skirt, this pillow is a cheap and easy way to get an expensive 1870’s look.


Read Full Post »

I’ve been working on a costume for my first steampunk convention in the fall, along with a character because as I understand it, that’s also part of steampunking–but that’s a different story for another time. At the moment, I have some progress pictures of what I’ve been making.

So far I’ve finished an overskirt to sit on top of that hoop skirt that I posted about previously. Also a part of this costume is the bustle I made a few months ago, but now it sits atop my new bustle pillow, and has thus been totally transformed. The top of the hoop skirt sits higher than the skirt, but that will be covered with either a shirt or a corset when I wear the whole thing together.

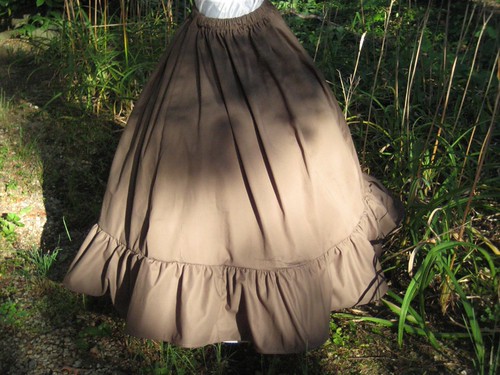
First I’ll talk about the skirt. It is made from this absolutely gorgeous and sturdy suiting fabric in a cotton-polyester blend. It is a dream to work with and wears very well. Easy to iron, press, and pleat, it also holds gathers and ruffles despite its heavy weight. It is also interesting color-wise; in different lights it takes on different hues, from gray to green to brown–perfect colors for a steampunk, no?

The skirt also has three channels for draw strings under each of the seams so that it can be bustled and tied up.

Here is the skirt without the hoop underneath it. Not quite as dramatic, but as you can see, still a very nice skirt maybe for a ren fair. I will have pictures of it bustled in a few days.

Here is the skirt with the red bustle on top. I really like the combination of the greenish-gray with the deep red. It’s a nice contrast without looking garish or Christmas-like. Red is also my favorite color so I’m glad that I could work it in as an accent color.

My plan is to make a cropped bolero jacket to match the skirt, a mini-garrison hat also in the same fabric as the skirt, and perhaps an underskirt to hide the bit of hoop skirt that tends to poke out. Also, when the skirt is bustled over the hoop skirt, I’m going to need an underskirt anyway because a whole lot more petticoat will be showing, and that doesn’t look polished without an underskirt. I just have to decide what color to make it!

Read Full Post »

When making any historically inspired costume, it is important to have the right undergarments to give the costume the correct shape.

Above is a hoop skirt, which is an effective way of holding a skirt in an otherwise unnatural and gravity defying shape. Hoop skirts require less material than if you were to try and achieve the same effect with an all netting petticoat. Hoop skirts are essentially a set of two to four round metal rings, sewn into a skirt. Then netting is placed over the skirt to smooth out the hoops and add a little extra volume.

It is more cost effective to buy a low-end hoop skirt with only a little tulle than it is to buy the materials to make one from scratch. So I made my hoop skirt by purchasing a low-end skirt off ebay, and adding my own petticoat netting to increase its volume and smooth out the hoops. I have heard of several other costumers doing this as well, and the results have all looked very nice.

This next odd undergarment is called a bustle pillow. It sits underneath a limp bustle to poof it up and show off it’s ideal shape. It basically makes your butt look ginormous, which was very stylish during the Victorian era.

I made this pillow using my own very simple pattern which I will be uploading soon. This one is just plain white cotton, pillow stuffing, and white ribbon. But some bustle pillows can be quite elaborate with colors, bows, lace, and embroidery. I decided to keep things simple, since its not intended to be seen while I’m wearing the bustle.

I’ll be posting pictures of clothing over these undergarments shortly. Until then, thanks for reading!

Read Full Post »

Free pattern: Cloak

Here is a free pattern for making a cloak. It’s very simple.

You can either make your cloak one thickness and hem the edges, or you can cut two layers for a lining. You sew the two pieces together around the edges, right sides together, leaving a space to turn the piece inside out. Enjoy!

Read Full Post »