Feeds:
Posts
Comments

I know a whole bunch of people still visit this blog often even though I’m not doing as much cosplay these days. Lately my focus has been on historical costuming and garment construction, which I post about on my portfolio website shaunart.net.

If you’d like to see more of my Viking life, then check out some of these posts:

If you’re more into general fantasy, but related to cosplay, maybe these are more your style:

And for genuine cosplay content, I’ve got some recently completed commission work to show you:

These are just a sampling of the new and continuously updated content at my portfolio website. I hope to see you over there, or you can sign up for my newsletter to receive new posts by email. Thank you for your continued support!


Hi Everyone!

I’ve noticed that I’m getting a lot of followers on this blog lately, which is great, I really appreciate it. However I don’t update this blog very frequently, and most of my sewing projects go straight to my portfolio website and blog. Here’s a list of where you can follow me if you want to see all my latest creations and sewing tips:

Website: http://www.shaunart.net

Blog: http://www.shaunart.net/?page_id=77913

Facebook: https://www.facebook.com/Shaunart.net/

Facebook cosplay specific: https://www.facebook.com/MetaCosplay/

Twitter: https://twitter.com/ShaunaLeva

Instagram: https://twitter.com/ShaunaLeva

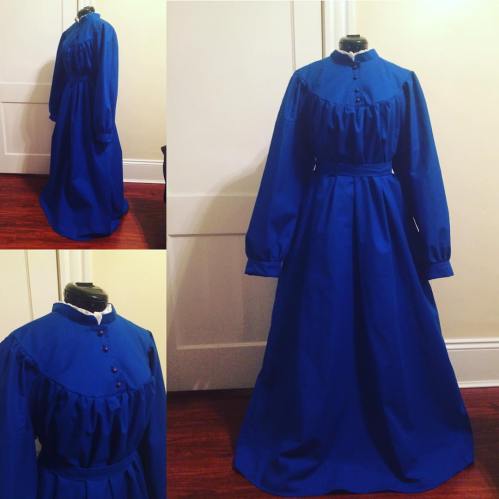
Here’s a preview of something I’ve just completed:

16796920_10208918387976975_4499221059968399265_o

Blog Migration!

My other blog has moved!! I have finally gotten around to building a new website to replace my very very old one. As a result, I have chosen to migrate my primary art blog to the new site. All previous and future posts will now live at Shaunart.net

If you are interested in receiving post updates, which I promise will be more frequent now that I’m back in the swing of things, I ask that you please subscribe to my blog at Shaunart.net

My cosplay blog will still be updated on occasion when I make new costumes, but small crafting projects, drawings, photos, and other musings will be posted to Shaunart.net

Thank you!

website screenshot

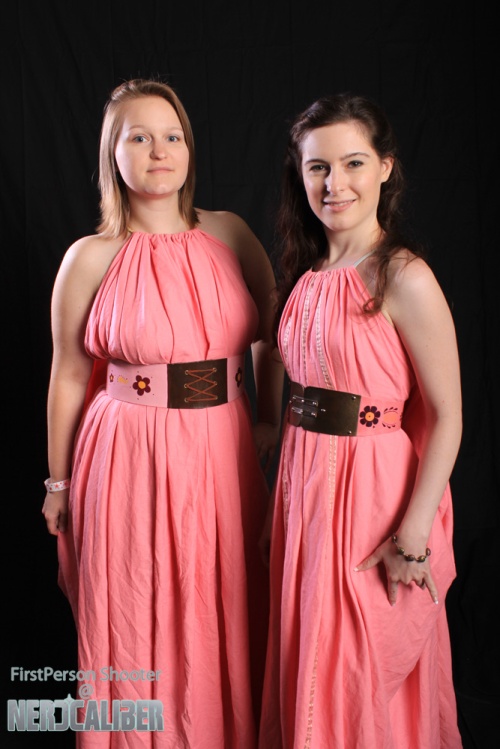
Very late in posting, but here is a look at our finished hand-maiden dresses from Game of Thrones, debuted at Granite State Comic Con, 2014.

These dresses were super comfortable to wear, and the look required very little for hair and make-up. It was kind of like wearing a big blanket all day!

IMG_1872

To see the dress in progress, check out this post. And this one to learn how to make the belt!

Granite State Comic Con was a blast! We met several members of the Game of Thrones cast, and took a picture with Pod!


*Game of Thrones Spoiler Alert*

Soooo I forgot to do a post on this costume! Back in January of 2014 a few friends and I did a “Red Wedding” cosplay from Game of Thrones. If you don’t know what the red wedding is, I’m sorry. Stop reading and don’t look at any of the pictures. If you do know what the Red Wedding is, I hope you enjoy this costume as much as I did. Don’t worry, we waited a tasteful 6+ months to debut this costume after that sad episode aired; we figured anyone really interested in watching or reading up to that point would have done so already.

Game of Thrones makes for the perfect winter cosplay. Arisia is held in January in Boston, so it was a little cold outside…but we weren’t cold! Our medieval garb allowed full-coverage and lots of comfortable layers. Really, aside from the hair extensions and gore, I could sleep in this costume. Yes, those are hair extensions. On the left we have the freshly stabbed Talisa Stark (aka Jeyne Westerling), in the middle is an impaled Rob Stark, and on the right is his grieving, forever silent mother Catelyn Stark. The dresses themselves were very straight-forward and we easily found patterns to accommodate us. The gore on my Talisa costume is all acrylic paint and nail polish (so that I wouldn’t be sticky. There’s nothing worse than having sticky, unstable gore on a costume that could smudge on someone else). Catelyn used my gelatin wound technique and nail polish to create her neck gash.

The above photo is of a cool Game of Thrones group that we ran into at the convention.

Recently I made a King’s Landing Handmaiden dress from the ever popular series Game of Thrones. To complete the look, I needed a leather hand-painted belt. This is my step-by step process on how to construct said leather belt. You will need copy paper, a pencil, 3-5oz veg tan leather, leather scissors or a sharp box cutter knife. A leather punch with multiple sizes, a mallet, leather rivets and a leather rivet-setter tool, grommets, a grommet setter, some cord, liquid acrylic paints, and acrylic varnish. Optional leather tooling stamps.

IMG_1127.JPG

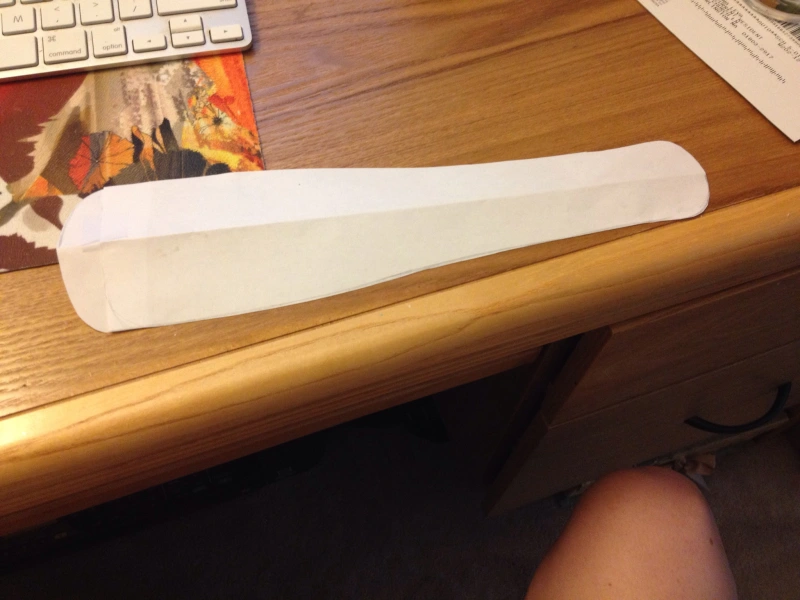
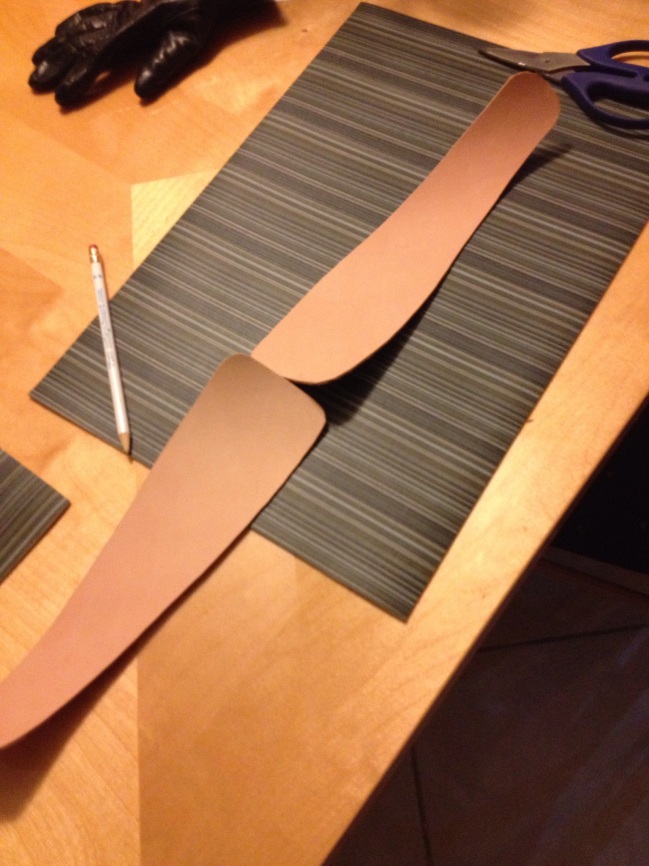
Start by drafting a pattern with a piece of paper. You can customize the size and shape to accommodate your own measurements. This section represents HALF of the belt. One half, on me, was roughly 10 inches long and 3 inches tall. I recommend experimenting and holding it up to your waist to see what looks good on you. If you have a long torso like me, try a tall belt. If you have a short torso, a short belt may look best.

IMG_1128.JPG

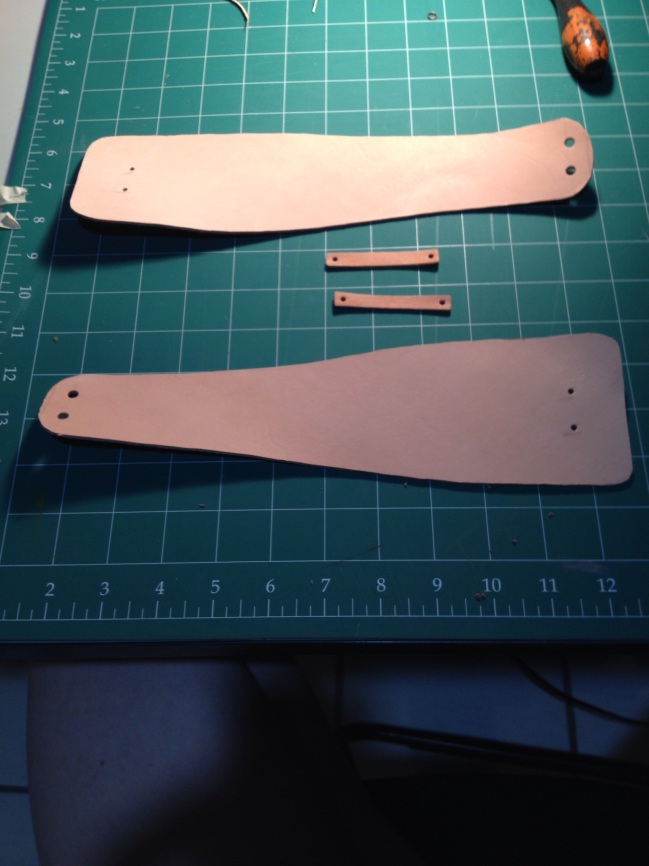
Trace the two halves of your belt onto 3-5oz vegetable tanned leather. Cut out using leather scissors or a box-cutter knife. I find that Scissors are way easier to get a clean cut with. You must take extra care with a knife to keep your edges clean.IMG_1129.JPG

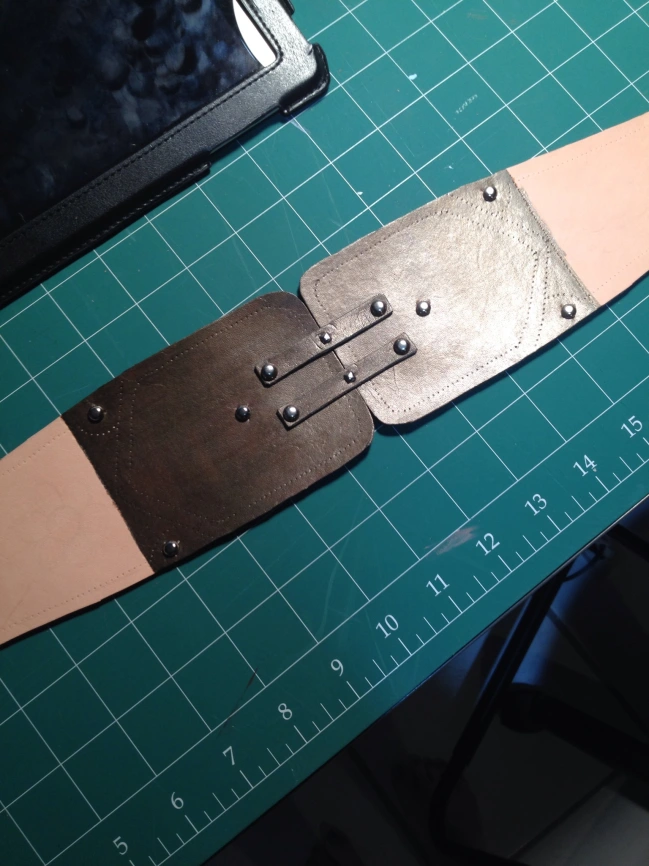
To connect the two halves in the middle, cut some connection pieces for the same leather. I chose to connect the two halves with two thin rectangular strips of leather, but you may choose to use one thicker strip.  Line all the pieces up and mark where to punch holes for your hardware. The smaller holes on the wide side of the belt are for rivets that will join the two halves together. You should punch a hole just big enough to slide a rivet through, and no larger! The larger holes on the thinner end of the belt are for grommets which you will use to lace up the belt when it is complete.

IMG_1130.JPG

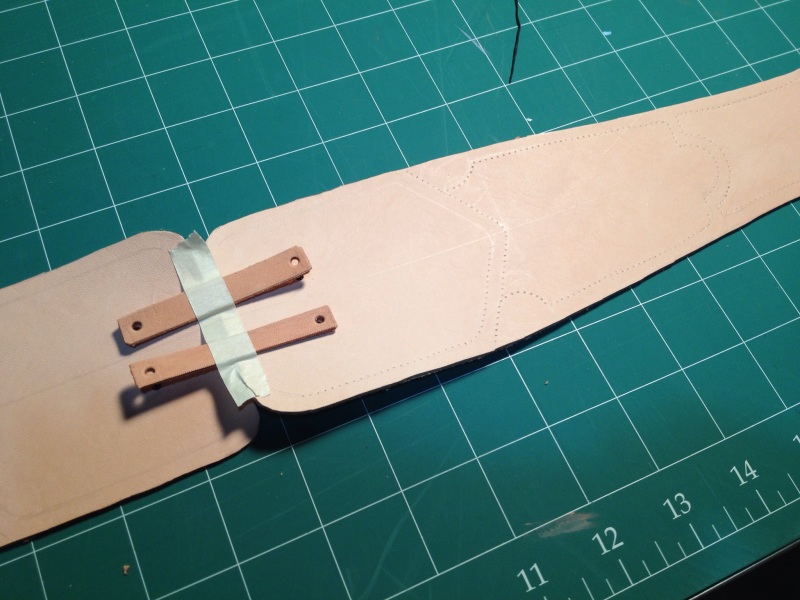
At this stage you may add any decorative tooling. I’ve done a simple stippling stitch pattern, which I only loosely followed while painting. It adds an extra level of texture and intrigue to the belt but it is not an essential step.

IMG_1131.JPG

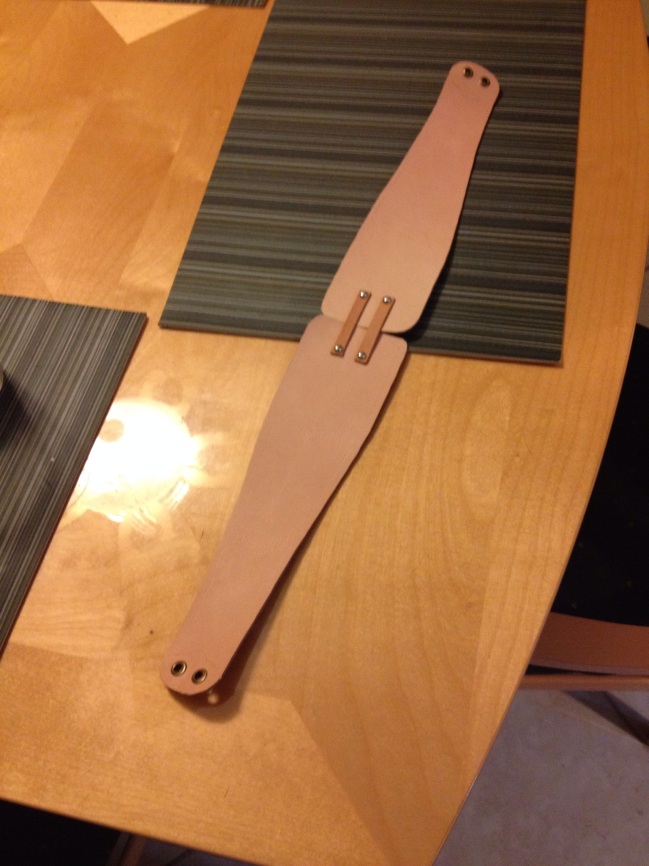
Time for hardware! Rivet the belt together and insert and secure grommets. You will need a rivet setter and a grommet setter. You can’t make it look pretty with make-shift tools.

IMG_1138.JPG

Begin painting and embellishing! I recommend painting before applying any studs or embellishments. I paint my leather with liquid all purpose acrylics, and seal with an acrylic varnish. They come in a range of finishes; I prefer glossy for most projects. The paint that I mixed for the center of the belt had a little shimmer to it, which I think looks nice on a feminine character, but some costumes do not want to look shimmery.

IMG_1187.JPG

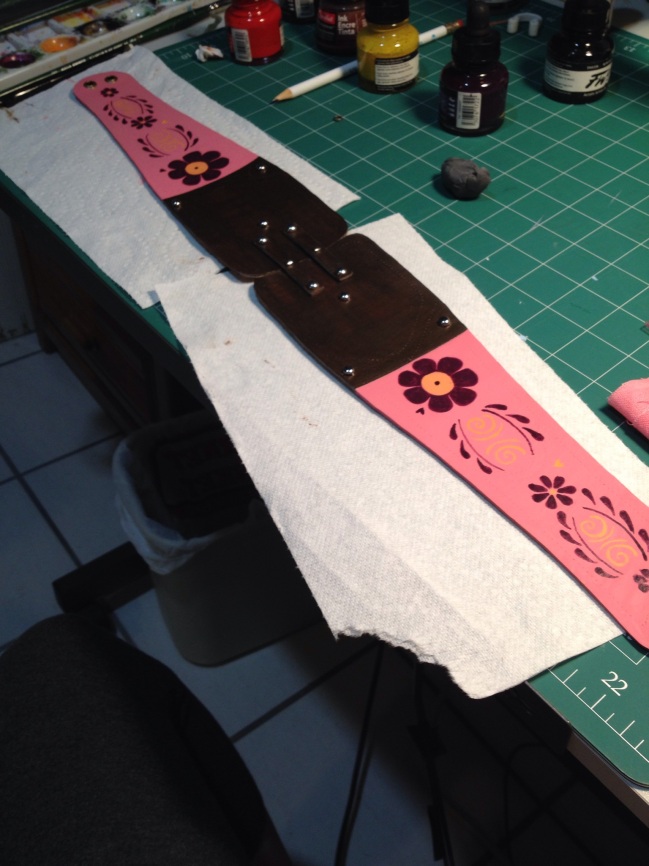
Hand-painted details will make your belt really stand-out. Here I did a base coat (or two) of pink over the most of the belt and let it dry completely overnight before painting on the flowers. You can draw lightly over dry acrylics with a pencil to plan out your design. Then paint right over the pencil. When the design is completely dry, use a kneaded eraser to lift up any pencil that is still visible. It should come off pretty easily–don’t scrub too hard. Once all the pencil is gone you can varnish the whole belt.
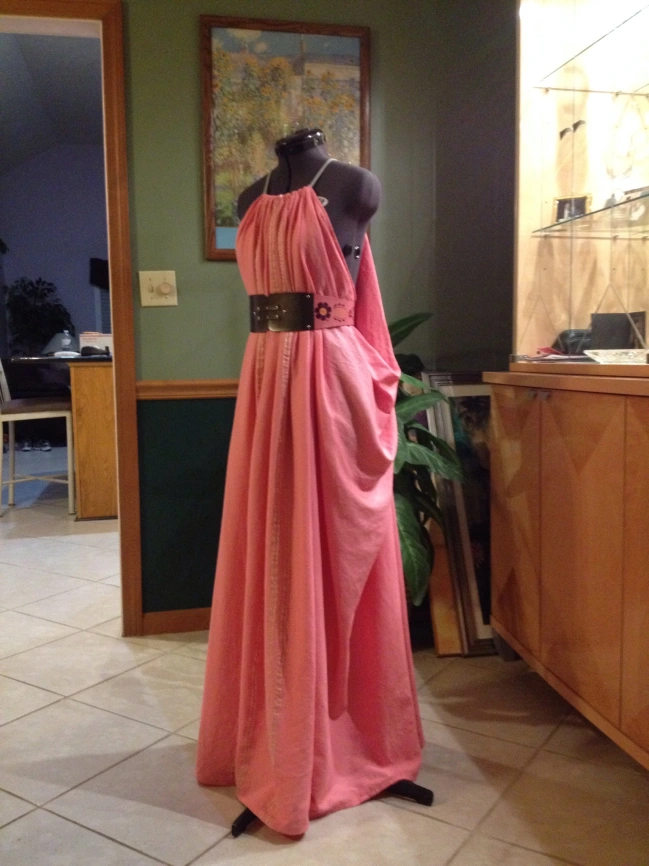
IMG_1189.JPGHere is the belt with the completed handmaiden dress. It really pulls the look together, right?

Long time no post! I’ve missed a few costumes that I’ll have to get up here soon…but for now, this is what I’m working on at the moment. It’s a handmaiden gown from Game of Thrones! I plan to wear it to this year’s Granite State Comic Con (2014), which happens to have a little GoT theme going on….They have several guests from the show attending, and will be holding quite the hand-full of GoT panels, as well as an official 21+ GoT after-party.

IMG_1161.JPG

The handmaiden dress is a lot more simple than everyone assumes it is. The most difficult part of the dress so far was finding the right kind of fabric, in the right color, and with enough yards available to make three dresses (one for myself, and two for friends). We had to order online to find enough yardage, which means there was no feeling the fabric before selecting it. The color is lovely, but ideally we would have selected a fabric that was a little more light-weight. This is a linen-rayon blend, and has a stiff hand, though a nice drape. It’s a dream to work with but isn’t quite as airy as the dresses look on-set.

IMG_1149.JPG

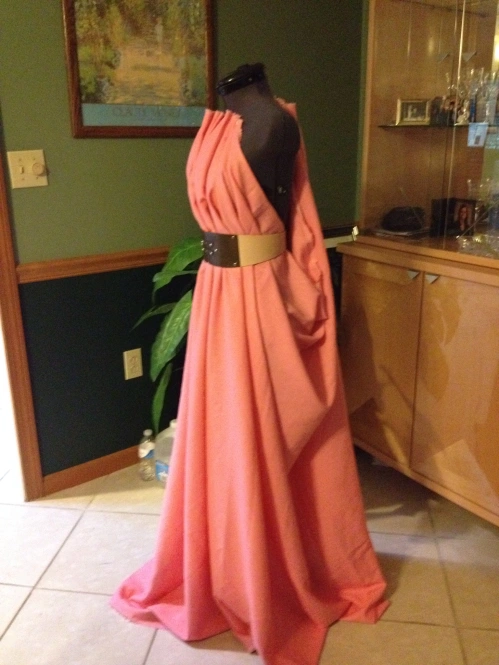
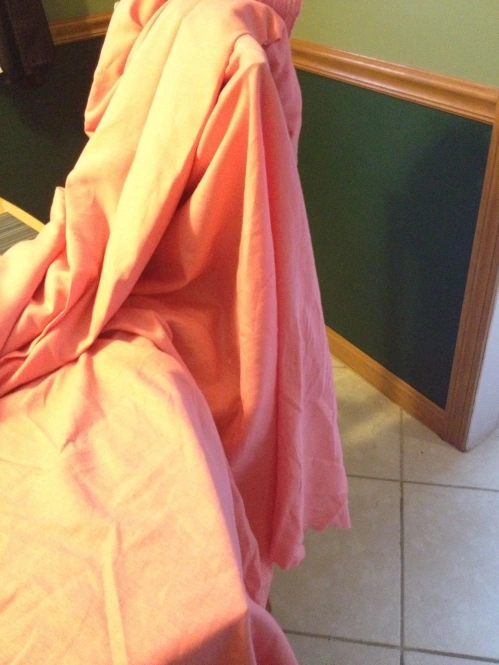
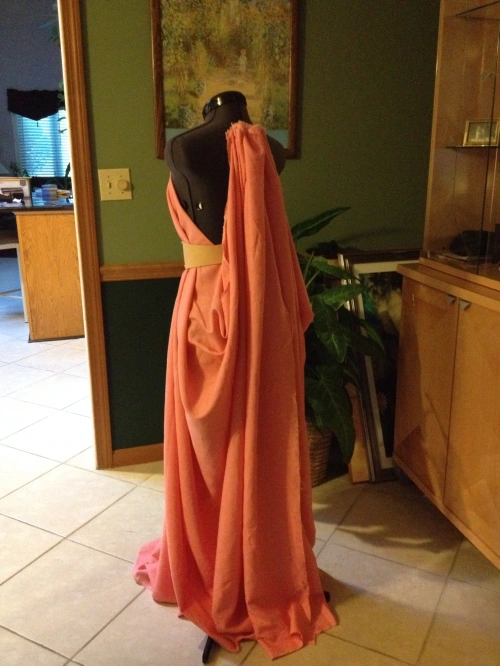
These pictures are of my initial drape: no hems or anything, just 4 yards of fabric draped on my dress form with an unfinished leather belt. It is an awful lot of fabric. The dress will weigh more than 2 pounds when its done, which may not sound like a lot, but believe me it’s more than your everyday clothes weigh. My friends and I decided to be handmaidens because we assume that there will already be a whole mess of main characters from GoT attending this con. Maybe by being generic background characters, we may actually stand-out. We will also be incredibly comfortable.IMG_1162.JPG

2013 blogging in review

The WordPress.com stats helper monkeys prepared a 2013 annual report for this blog.

Here’s an excerpt:

The concert hall at the Sydney Opera House holds 2,700 people. This blog was viewed about 59,000 times in 2013. If it were a concert at Sydney Opera House, it would take about 22 sold-out performances for that many people to see it.

Click here to see the complete report.

Granite State Comic Con

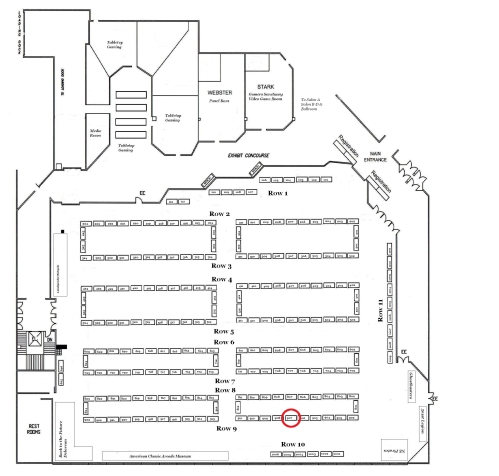
This weekend (Saturday and Sunday), Kelley and I will be exhibiting and selling our wares at Granite State Comicon! You can find us in the Artist’s Alley, booth number 907. I’ve included a map below with our table circled.  Granite Con will be held at the Radisson Center of New Hampshire, 700 Elm Street, Manchester on September 28th & 29th.

Granitecon 2013 Floorplan copy

The spaces for Granite Con are not as big as the one we had for Connecticon, so we won’t be able to bring our vertical displays, but we still plan to pack our table with leather masks, armor and bracelets, handmade jewelry, costume accessories, hair pieces and more! Kelley will be doing face paint and balloon animals, and I’ll have my caricature supplies on hand! We’re happy to do your makeup for the convention with Kelley’s hypoallergenic face paints, or get your costume started for Halloween with the perfect mask. Want something specific made for Halloween? We take commissions! If you order a mask at the convention, we will have it to you in time to celebrate every costumer’s favorite holiday on Oct 31st.

granitecon icon

For more information on placing a commission, you can visit my website at: http://shaunart.net, or send me an email direct.

For more information on the convention, check out their website: http://granitecon.com

Nauticon 2013

Well that was sure different…. this past weekend Kelley and I attended the second annual Nauticon, New England’s only 21+ convention. Held in beautiful Provincetown, MA, Nauticon considers itself to be a “destination con,” and encourages guests to enjoy the beach and the convention routine simultaneously.

This was our first time attending Nauticon and my first time to Provincetown, period. So I didn’t really know what to expect besides the copious alcohol. We arrived around noon on Saturday to get our badges and….it was eerily quiet. We got our badges in two seconds and asked, “well, where is everyone?” Turns out, everyone was still asleep or hungover from the night before….oh. The convention only had 250 people in attendance, and I guess the vast majority of them liked to sleep in.

Panels didn’t start until noon either, so there’s no point in arriving to a convention like this early. We got into panels no problem while everyone was still in bed. Actually, we got into panels fine all day. No lines. No waiting. For anything. Ever. And the panels weren’t bad either; there just weren’t a lot of them.

On of the most interesting panels we attended was a makeup discussion hosted by a large group of Drag Queens. They answered questions ranging from “how to get started,” to contouring for everyday wear, to how to cover and repaint your eyebrows. They even did a little makeup on some of the women in attendance. I asked a question about contouring, and they had me come sit at the front of the room so they could model my nose and cheeks. It was a fun and eye-opening experience. since makeup was a big part of my costume for the weekend.

Kelley and I, unfortunately, were some of the only people there in costume. Others claimed to be cosplayers at other cons, but chose not to dress up for this extremely casual affair. We were dressing casual for us: original designs that weren’t too big or cumbersome. Our costumes were of “Victorian Secret Models,” an obvious pun and excuse to wear Victorian underpinnings as outerwear. We received compliments on our appearances, but not more than a handful of pictures. We didn’t see more than one photographer the whole time we were there. We only lasted in costume until dinner time, because we felt an extreme lack of enthusiasm from the rest of the con when it came to dressing up. Even into the evening, everyone else was wearing jeans, hoodies and sneakers.

Saturday evening the convention offered two very special events: The Diva Show, and the Luau. Both were pay-to-enter events, and we attended neither because they conflicted with our other dinner plans. We heard from others that the Luau wasn’t worth the money, but the Diva show looked like it would have been interesting. After dinner we got a drink at the bar and went to an awesome sing-a-long panel. The crowd got free jello shots for every five 80’s and 90’s cartoon theme song sung! It was tons of fun.

The Artist’s Alley at Nauticon was rather small.  A dozen hotel rooms were designated as booths and sleeping quarters for the artists and craftsmen. There was no dealer’s room which was a big disappointment, but at least the artists were offering a variety of wares. I chose to spend my money at the masseuse on site. She was offering chair massages by the minute, table massages, foot scrubs and paraffin wax for the hands all at a great price! After the sing-a-long, Kelley and I treated ourselves to sugar foot scrubs and hand-waxes. It was pretty awesome.

Saturday night, instead of having any convention-organized events, the con left it up to the attendees to throw room parties. There were two guest organized events in a designated “party block” of the hotel. One shindig that Kelley and I attended was hosted by a group called “Barfleet,” which is a collection of nerdy bar-tenders, and drinkers who throw parties where they serve their own alcoholic concoctions for free! The stuff it strong, so they only pass out a little of each drink, but it is free. I couldn’t decide if receiving home-made alcohol in a hotel room from strangers for free was cool or sketchy, so I stuck with water. But there was a DJ and a  lot of good company, and IDs were being checked at the door, so it was fun either way.

Another cool late-night attendee run event was a swing-dancing panel, thrown together last minute by a few very talented attendees who actually knew what they were doing. We learned several basic steps and a few turns and twists too!

Sunday was a very low-key day at the convention. We didn’t go to a single event; everyone just sat in the hotel lobby coloring and networking. It was kind of fun to just hang out and talk. And we got to walk on stilts? Only at a convention, I guess.